

There are some things you make, and there are some things you buy. My older sister wrote a blog post about this a few years ago and the idea has stuck with me ever since. Yes, homemade, freshly baked bread tastes delicious, but after spending a summer as an intern baking literally hundreds of loaves of bread, I know that the intense science of yeast is best left to the professionals. That said, anyone who buys spaghetti sauce in a jar is a damn fool. Squished tomatoes simmered with some salt taste so much better and is so much cheaper.
I always assumed cheese would be on my "buy" list. Never actually having researched cheese making, I assumed it was like making wine - doable, but not conducive to a tiny New York kitchen situation. Plus, I just love shopping for cheese so much that making it at home never felt like something I needed to do. Unlike shopping for cold cuts. I would rather roast a whole side of beef and buy a deli slicer than stand in the Fairway deli line with my tiny slip of paper, waiting for my number to get called. Which is why Dan waits on the deli meat line while I shop for cheese.
So, when I decided to make cheese myself, it was because I was stuck at a grocery store with a less impressive cheese section. Unlike Fairway, Whole Foods or Gourmet Garage (a disappearing breed with some fantastic cheeses), Trader Joe's has some pretty run-of-the-mill sliced cheddars ready for stacking on sandwiches, or tubs of soft cheeses for spreading on toast and bagels. With the exception of an imported burrata here-or-there, it's not the kind of dairy section you linger at, sniffing at each funky, briny selection. But I love TJ's for other reasons (for example, everyone there is nice to me and it's closer to my house), so it was where I landed one day after work one day.
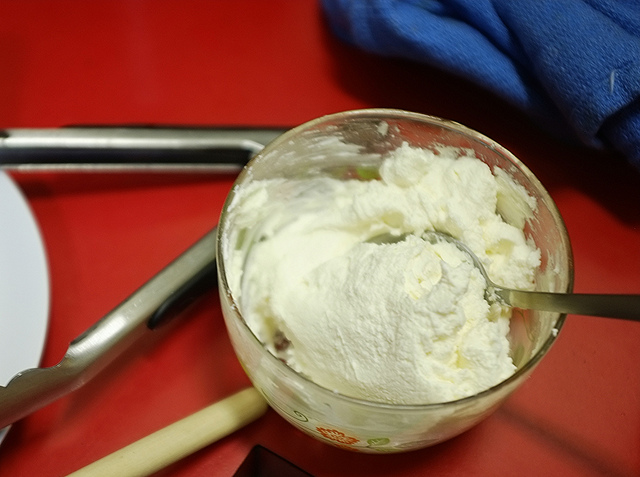
The checkout line that evening was typically endless, so I hopped on and shopped as I inched my way through the store. As I waited, I had the time to think about what it might entail to make a simple cheese to use in a baked egg dish I was planning. I had recently been to a dinner party where the cook had put out fresh, homemade ricotta for spreading on pita, along with fresh hummus and fancy olive oil. The cheese was still warm and so smooth that I ate more than my share and wasn't hungry for the main course. With that in mind, I pulled up a recipe for homemade ricotta, which involves just four ingredients (milk, cream, lemon, salt) and realized I had all of the equipment at home (cheese cloth, a fine mesh sieve, a kitchen thermometer), so I figured I'd try it out! (Boy, the kind of things a New Yorker achieves while waiting in the Trader Joe's line... an intense grip strength workout, not the least of these achievements!)
It turned out to be a delicious, happy result and I'll definitely be trying this again. The cheese was way creamier and richer than store-bought ricotta and tasted a lot less plasticy-processed! Here's the recipe, borrowed from Smitten Kitchen and adjusted very slightly because I enjoyed a bit of lemony tang to my cheese.
Homemade Ricotta
3 cups whole milk 1 cup heavy cream 1/2 teaspoon Kosher salt 4 tablespoons freshly squeezed lemon juice
1. Pour milk and cream into small saucepan. Gently stir in salt. Turn on heat to medium and begin to gently warm milk mixture until it reached 190 degrees. I used an infrared thermometer, which I love, but just make sure you have a trusty, accurate kitchen thermometer since temperature is key here!
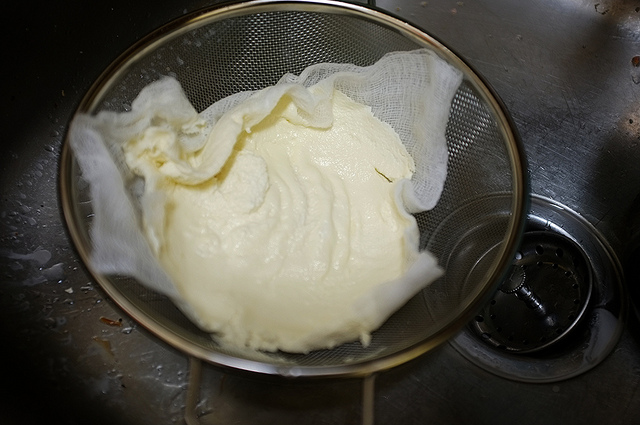
2. Once mixture reaches 190 degrees, turn off heat and pour in lemon juice. Stir gently just a few times and then let the milk sit, uncovered and untouched, for about five minutes. Meanwhile, line a fine mesh sieve with cheesecloth and place the sieve over a bowl. Ideally, the sieve would balance its arms on the side of the bowl, so that the sieve isn't resting on the bottom of the bowl. You want enough space for the bowl to catch they whey that will drip from the cheese, without the cheese/sieve sitting in the whey.
3. Once you've let the milk mixture sit five minute, pour the curds and whey into the lined sieve. Let the curds sit for at least an hour. The longer you let your curds sit, the firmer your ricotta will be. Note also that the cheese will firm as it cools, so you may wish to pack it up while it's still a slightly softer consistency than you desire. (I let mine sit for about an hour and a half and the cheese, once cooled, had a consistency similar to cream cheese.)
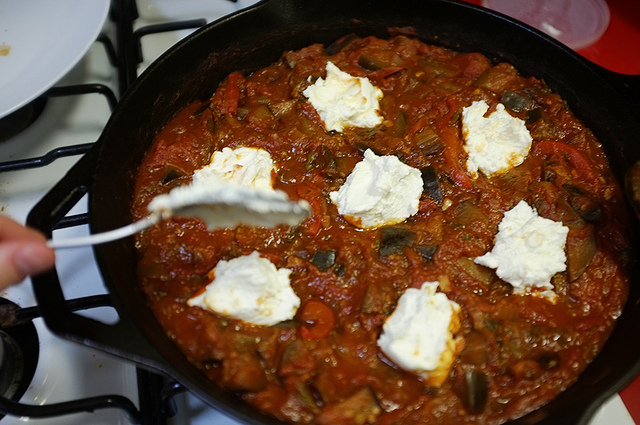
4. You can discard the whey or, if you desire, use it in a bunch of crafty ways, which is less up my alley. Eat the ricotta immediately (spread on toast, use as a dip), or store it for up to two weeks in the refrigerator.